Sunday, 22 May 2016

WARM PURPLE & GOLD MAKEUP TUTORIAL

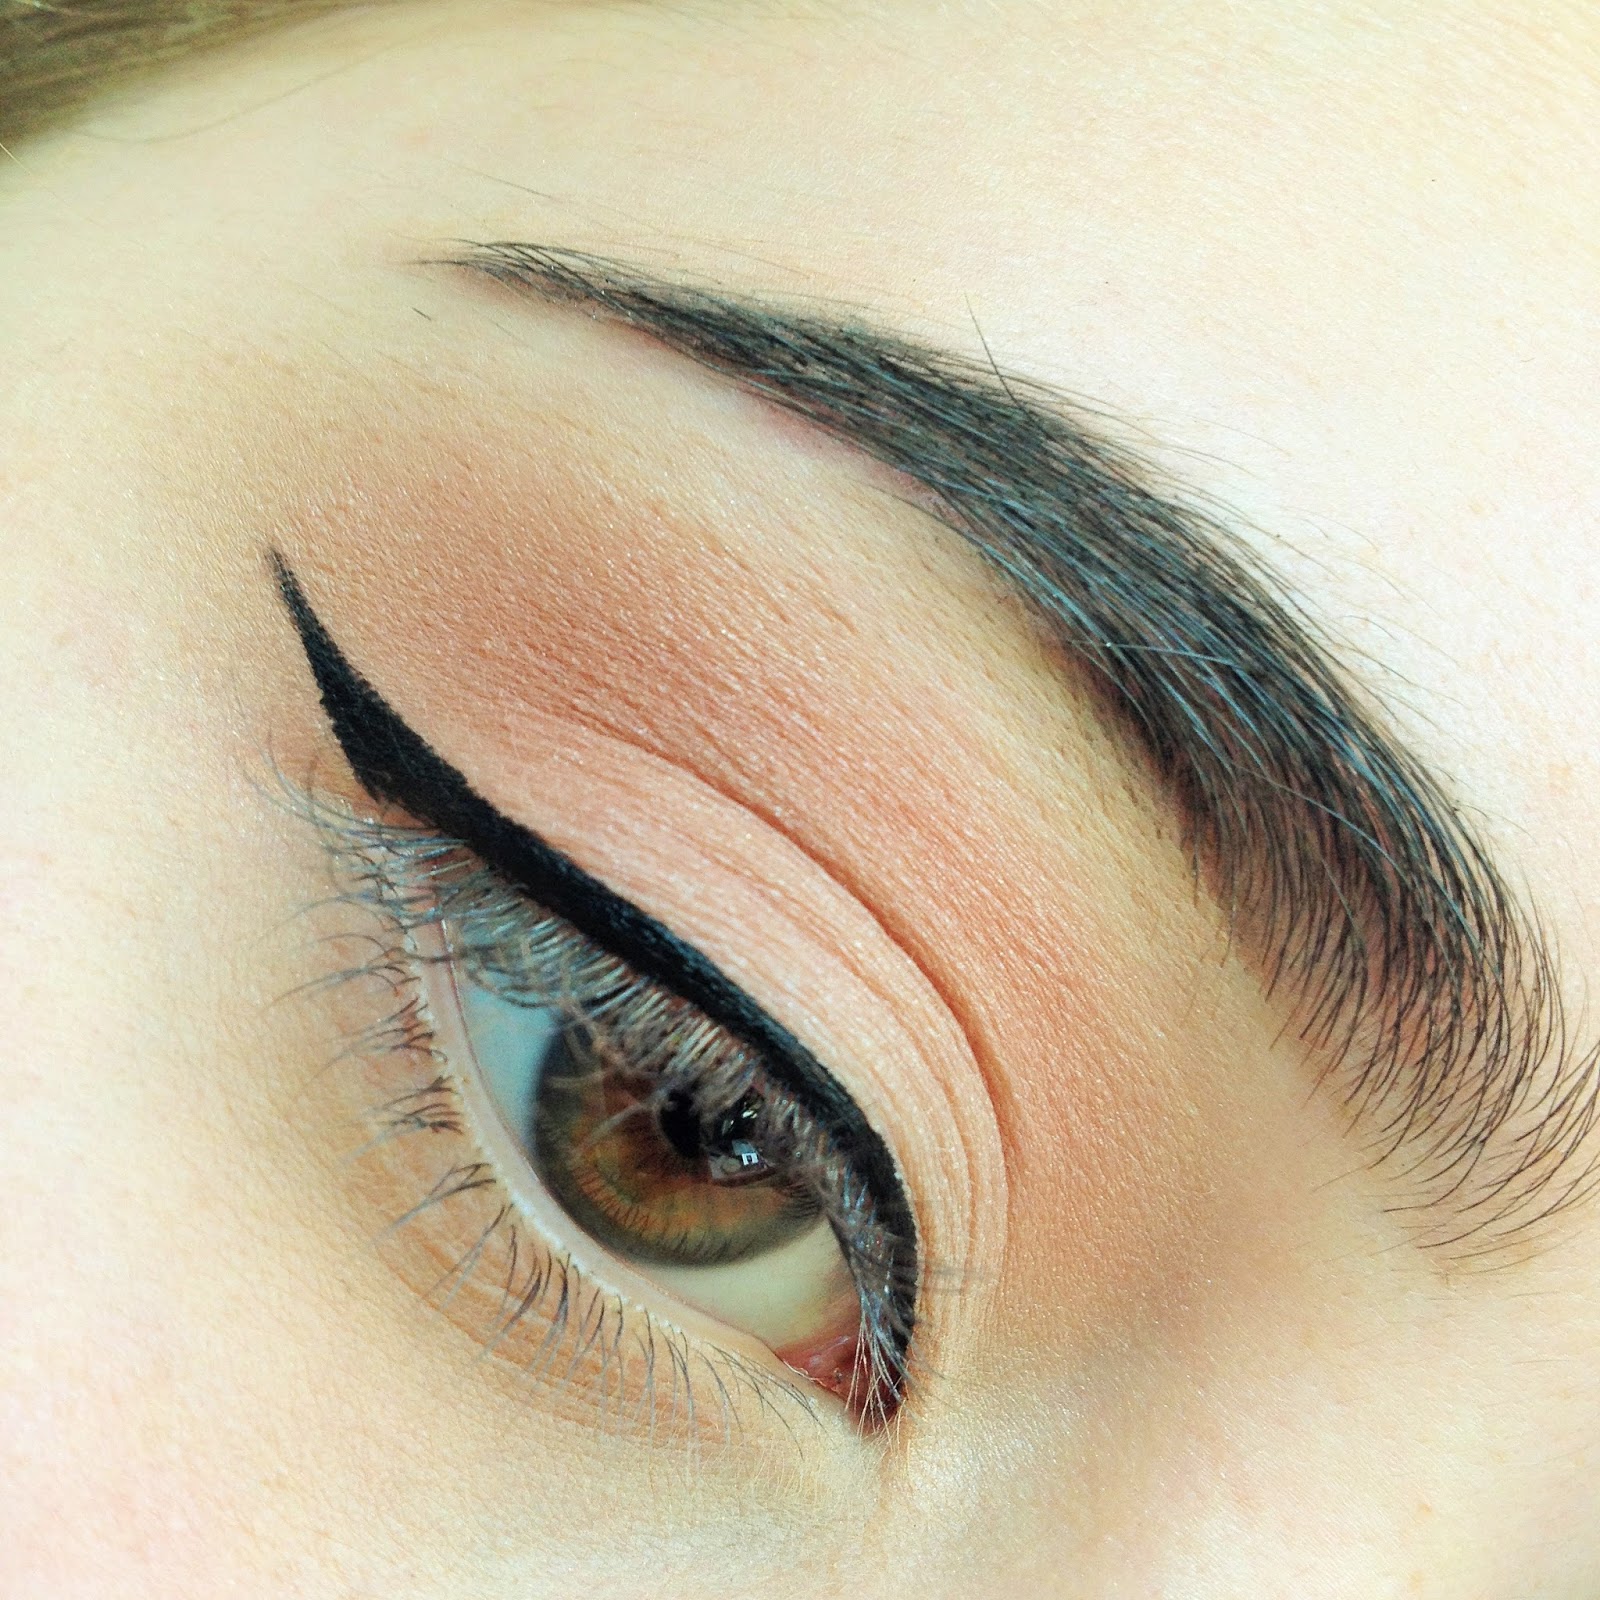
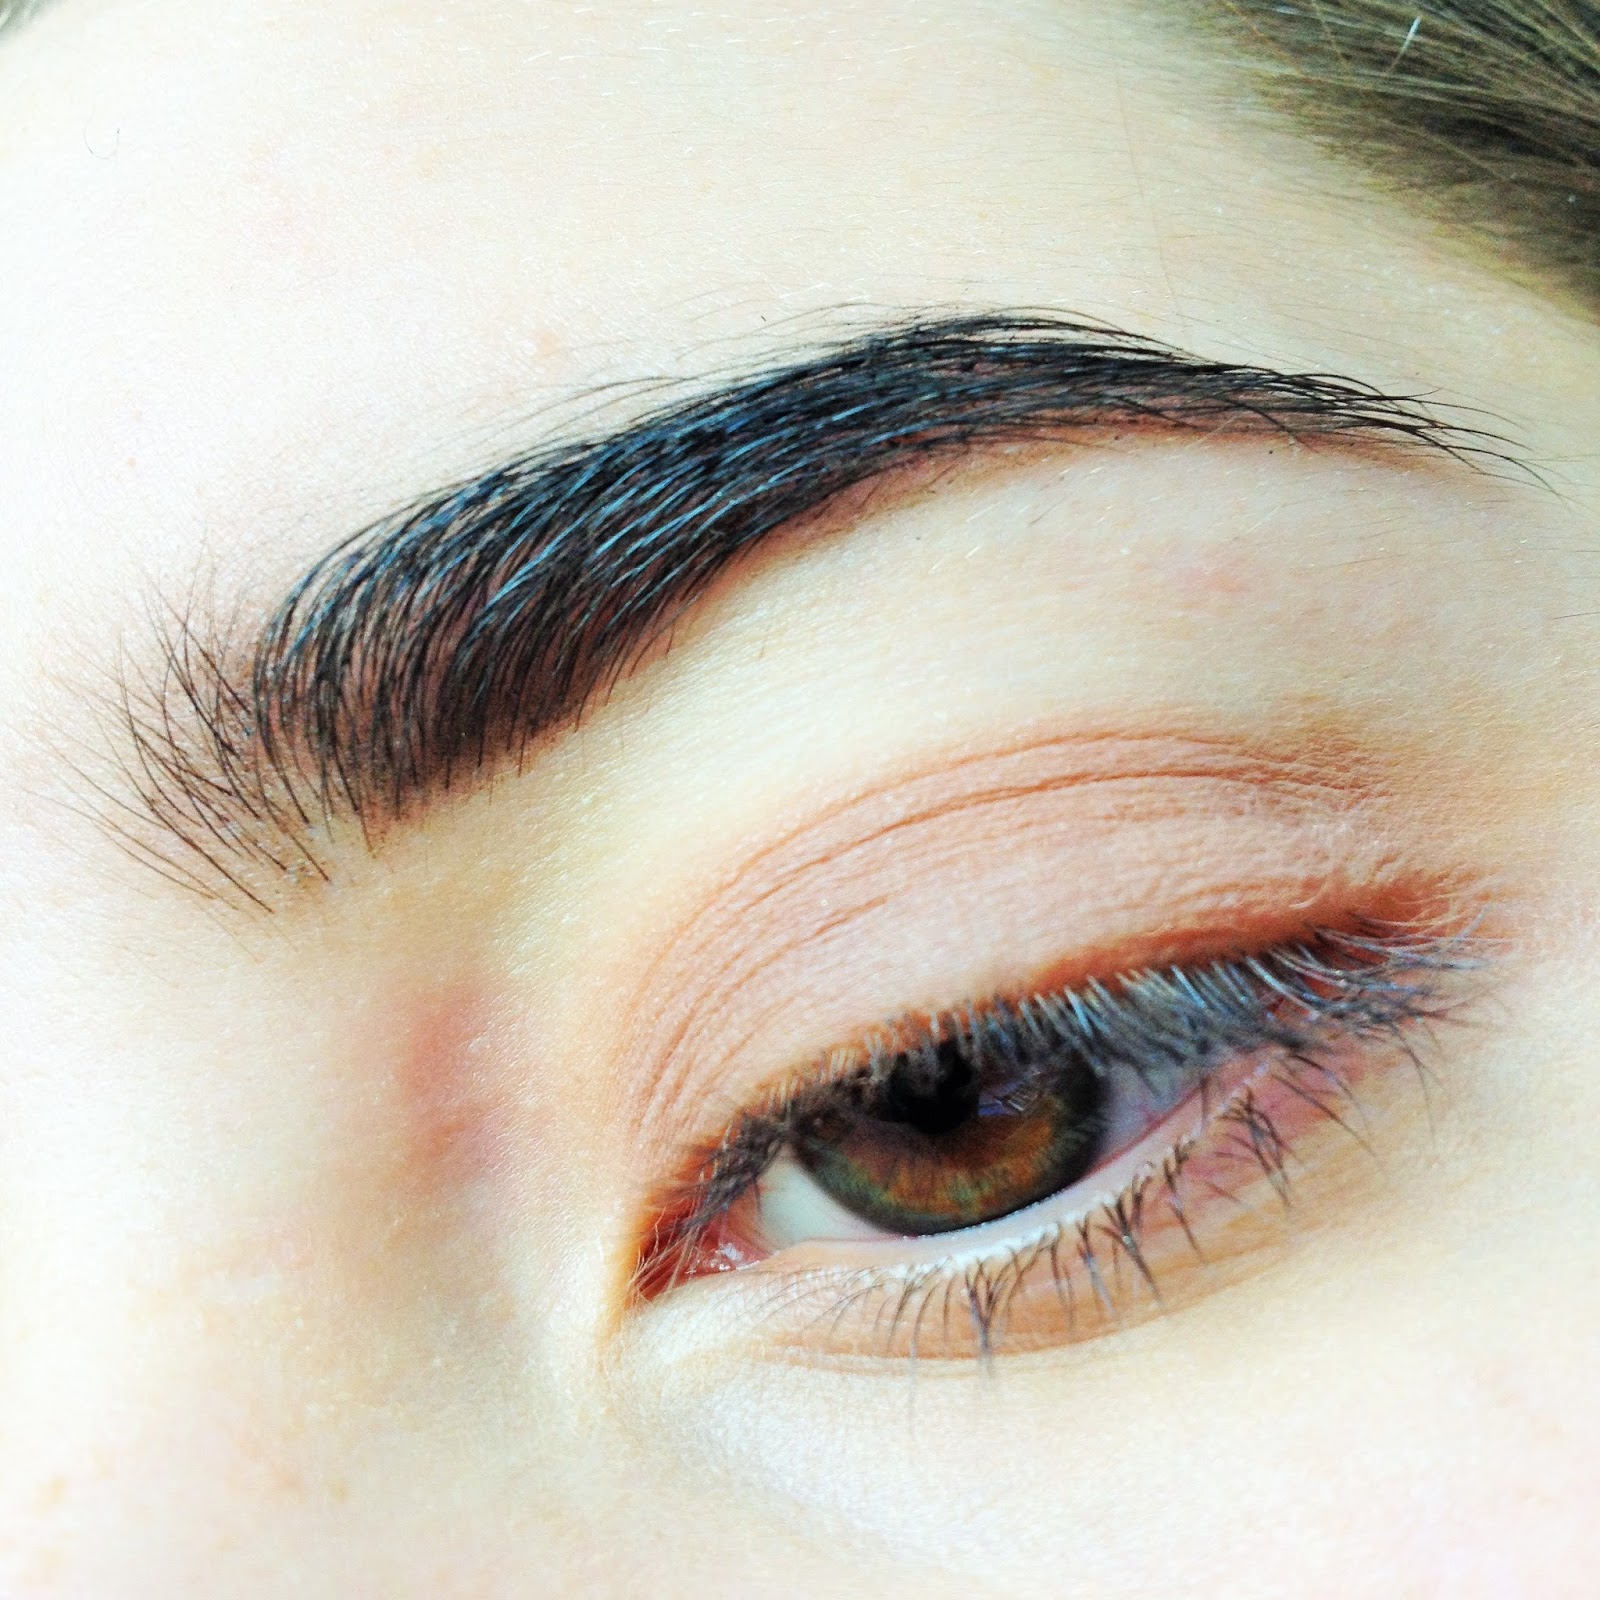
Today, Ill be showing you how to recreate this look. I really wanted to create a look using purple eyeshadow, so this is what I came up with! Again, I'm sorry for not posting on Wednesday, I just have a lot to do for school. I think I'm going to have to schedule posts for the next 6-7 weeks because I'll be very busy. However, after that I should be back to posting two times a week, hopefully even more. Im planning on doing what's in my makeup bag, as I have been doing the same look basically everyday. Also, I want to do some more wearable eye looks!
After applying primer and filling in my brows I applied the second shade from the Clinique All About Shadow Quads in 'Going Steady' into the crease of my eye and the outer third of my lid.
I then applied the shade 'glow' from Makeup Revolutions Smokey Palette . I used my finger to do this, too get the best pigmentation out of the eyeshadow.
I then applied the darkest eyeshadow from the Clinique quad, on the outer third of my eye and brought the second shade in Clinique's quad under my eye. I also applied BECCA champagne pop in my inner corner, to open my eyes up.
Lastly, I cleaned up the edge of my eyeshadow, and applied eyeliner, mascara and individual lashes
I hope you enjoyed this post, please subscribe to be notified when I post or follow me on bloglovin, I really appreciate it!


Sunday, 15 May 2016

MY FAVOURITE AFFORDABLE FOUNDATIONS

 Today I will going through my favourite affordable foundations. I feel like foundations are such a personal thing, a product could be very popular and then you buy it and it doesn't work with your skin. Some people are lucky enough for their skin to not react with any foundations, but others, the majority, go through so many foundations just to find one perfect for them.
 
Rimmel Match Perfection I only got this recently, but I have quickly become in love with it. It gives a medium coverage, but it is buildable. The foundation claims to blend with natural skin tone, rather than masking it. It also claims to reduce the size of pores, which I definitely agree with. I always apply the Nivea Post Shave Balm as a primer, which doesn't reduce pore size, which other primers often do, so I know it is the foundations formula. It comes in 12 different shades, ranging from light to dark, so hopefully there is a shade for all skin tones. I am in shade 103 true ivory, which is one of the lightest shade and I am fairly pale.
 
Loreal Paris Infallible Matte For about three months this was the foundation I had on everyday. It is the best affordable foundation I have found to actually stay on all day while staying matte, However, there are only 6 shades, which is fine for most, but for darker skin tones there is no appropriate shade. I have to mix the shade Ivory and Sand to get my skin tone. I have found it to be a bit cakey on the skin, But it is the only foundation that stays on my skin all day so this doesn't really bother me too much.
 
Bourjois Healthy Mix I really like this foundation, It claims to last 16 hours which I haven't tested but It definitely lasts for a long time. It is meant to give a healthy glow to the skin without appearing oily, which I also agree with. Again there isn't a large shade range, so it's not great for darker skin tones. I like this foundation because It gives medium coverage but looks invisible on the skin. I am in the shade Light Vanilla, which suits me perfectly.
 
Loreal True Match I only got this recently and I think it's perfect for people who like a dewy finish for their foundation. Personally I found by the end of the day I looked too shiny and I needed to keep applying powder. However, I know many people like a dewy finish so I thought I would include this in my favourite affordable foundations. Also it comes in 23 shades so is perfect for all skin tones and looks almost invisible on the skin!
 
From the far left; Loreal Paris Infallible Matte, Borjois Healthy Mix, Loreal True match, Rimmel Match Perfection   
(Without flash)
(With Flash)
 
Thankyou for reading, hope you found this helpful, I'm sorry for not posting on Wednesday but hopefully I will this week.
 

Sunday, 8 May 2016

ROSE GOLD LINER EYE MAKEUP TUTORIAL

I recently saw a picture on Anastaia Beverly Hills instagram account of a makeup look someone has created (you can see it here), I thought it was so pretty and had to recreate it. My recreation was nowhere near as good as her's but I think that was due to the rose gold foiled eyeshadow I used, I think the girl used Dirty Talk by Colour Pop, a crème gel colour pot. But in England you cannot buy Colour Pop so I could only use what I had.
 Firstly I applied the Urban Decay primer potion for my base.
I then applied Kiko's Infinity shadows in the shade 210, into the crease of my eye and the outer third of my eyelid.
I then applied my black liner, I used the Maybelline master precise.
Lastly I applied the rose gold eyeshadow just above the black liner. I found this difficult to do because the chunks of glitter in the eyeshadow were quite big and it was difficult to have a smooth line. I also applied mascara to my top and bottom lashes, I used the telescopic mascara by Loreal. I used eyelure's individual lashes to finish the look.
Thankyou for reading, It wasn't a very difficult tutorial but I thought it was a really pretty look that I wanted to recreate.


Wednesday, 4 May 2016

DIY POLAROIDS

I didn't know whether to post this or not as its a bit different to my normal beauty posts and it might be a bit self explanatory. I think polaroids are so cute, however the camera and film is so expensive, especially when polaroids are not that hard to make. I know this is a bit different from my normal posts but I wanted to share this as I think its such a good, affordable gift idea. I currently have quite a few pegged on to a piece of string in my room and I think it looks really pretty, I also gave some to my friend for Christmas and she seemed to love them!
I have created a template for you to use (here) and all you need to do is attach the pictures you wish to use. You could include pictures of anything you want. I have pictures from my holiday last year and pictures with my friends and family.

1.Once you have downloaded the document go to insert - image...

2.Then select the images you want and drag them onto the polaroid template and alter them to fit the sizing.

3.Then click on the printer button. For the best result, use photo paper when printing. I would choose A4 sized photo paper, unfortunately I only have small sheets but that's fine as it still works perfectly.
4. Once printed, cut around the outline and you have your finished polaroids. You can now use them however you want. Hope this was interesting, Thankyou for reading xx

Sunday, 1 May 2016

LOREAL PARIS COLOUR RICHE LA PALETTE IN NUDE REVIEW

I feel like I haven't wrote a post in ages because my last four of five were scheduled to go up weeks ago. Anyway, today I am reviewing Loreal's lip palette in the shade NUDE, the palette contains six shades and a small lip brush. Each contains 1g of product which is obviously a lot less than normal lipsticks. However, If there is one shade you love and run out of, you would have to buy the whole palette again, which costs £12.99, so you might as well buy a mac lipstick which is similar to the shade.

The first shade is the lightest of the six, It can be worn everyday for a subtle look. The next two are peachy shades, the first has a pink undertone whereas the second has an orange undertone. The fourth shade is a dark pink, the fifth is a darker version of the first shade. And the last shade is a dark brown, I would compare it to Velvet Teddy by MAC.

I would say the shades have don't have a matte finish but I find throughout the day they can be quite drying.


Thankyou for reading, I hope you found this useful.


Wednesday, 27 April 2016

STILA EYES ARE THE WINDOW SOUL PALETTE TUTORIAL

On Sunday I reviewed Stilas Eyes Are The Window SOUL palette and today I will be showing you how to create this simple eyeshadow look using the palette.
Firstly I applied the shades 'heart' and 'individual' onto my lid. The shade individual was too warm so I added heat to make the overall look be more cool toned. I used a small dense brush to do this.
I then applied the shade 'being' into the outer third of my eye using a blending brush.
I then applied the shade being under my eye and also added the shade kitten under my eye towards the inner corner of the eye.
I then added winged liner and mascara. My eyeliner went wrong so just ignore that. I didn't use fake lashes because I wanted to create a more natural everyday look.
Thankyou for reading.
 

Sunday, 24 April 2016

STILA EYES ARE THE WINDOW SOUL PALETTE REVIEW

Around a week ago I reviewed the Stila Eyes Are The Window SPIRIT palette review and tutorial and today I will be reviewing Stila's other palette in the shade SOUL. Both the palettes packaging are very similar, so I will only briefly go into detail with the packaging for this palette. The palette has beautiful simple rose gold packaging with three 'S' engraved into it. It has a huge mirror in it which is always useful when doing your makeup and travelling etc. The palette has twelve shades containing mainly warm browns and muted pinks, the palette includes 4 matte shadows and the other 8 contain shimmer. Like spirit, the palette comes with a plastic sheet with a quote on saying "Since love grows within you, so beauty grow. For love is the beauty of the soul." -Saint Augustine. The shade names are on the back of the palette which I prefer then the shades being on a plastic sheet. I will be posting a easy tutorial using this palette on Wednesday. In the UK you can purchase this at M&S and some boots, also online.
 
Thankyou for reading.