Sunday, 12 June 2016

EYE LOOK USING MAKEUP REVOLUTION IONIC SMOKEY PALETTE

Last week I reviewed Makeup Revolution's Ionic Smokey Palette and today I have created a look using ONLY that palette.
Firstly I added the shade Silvery onto my lid. I used a fixing spray on my brush to get the same pigmentation of the eyeshadow in the pan. If u don't have a fixing spray you can just wet your brush and this basically gives you the same effect. I used a dense brush to do this and then I used a blender brush to blend the shadow out into my crease.
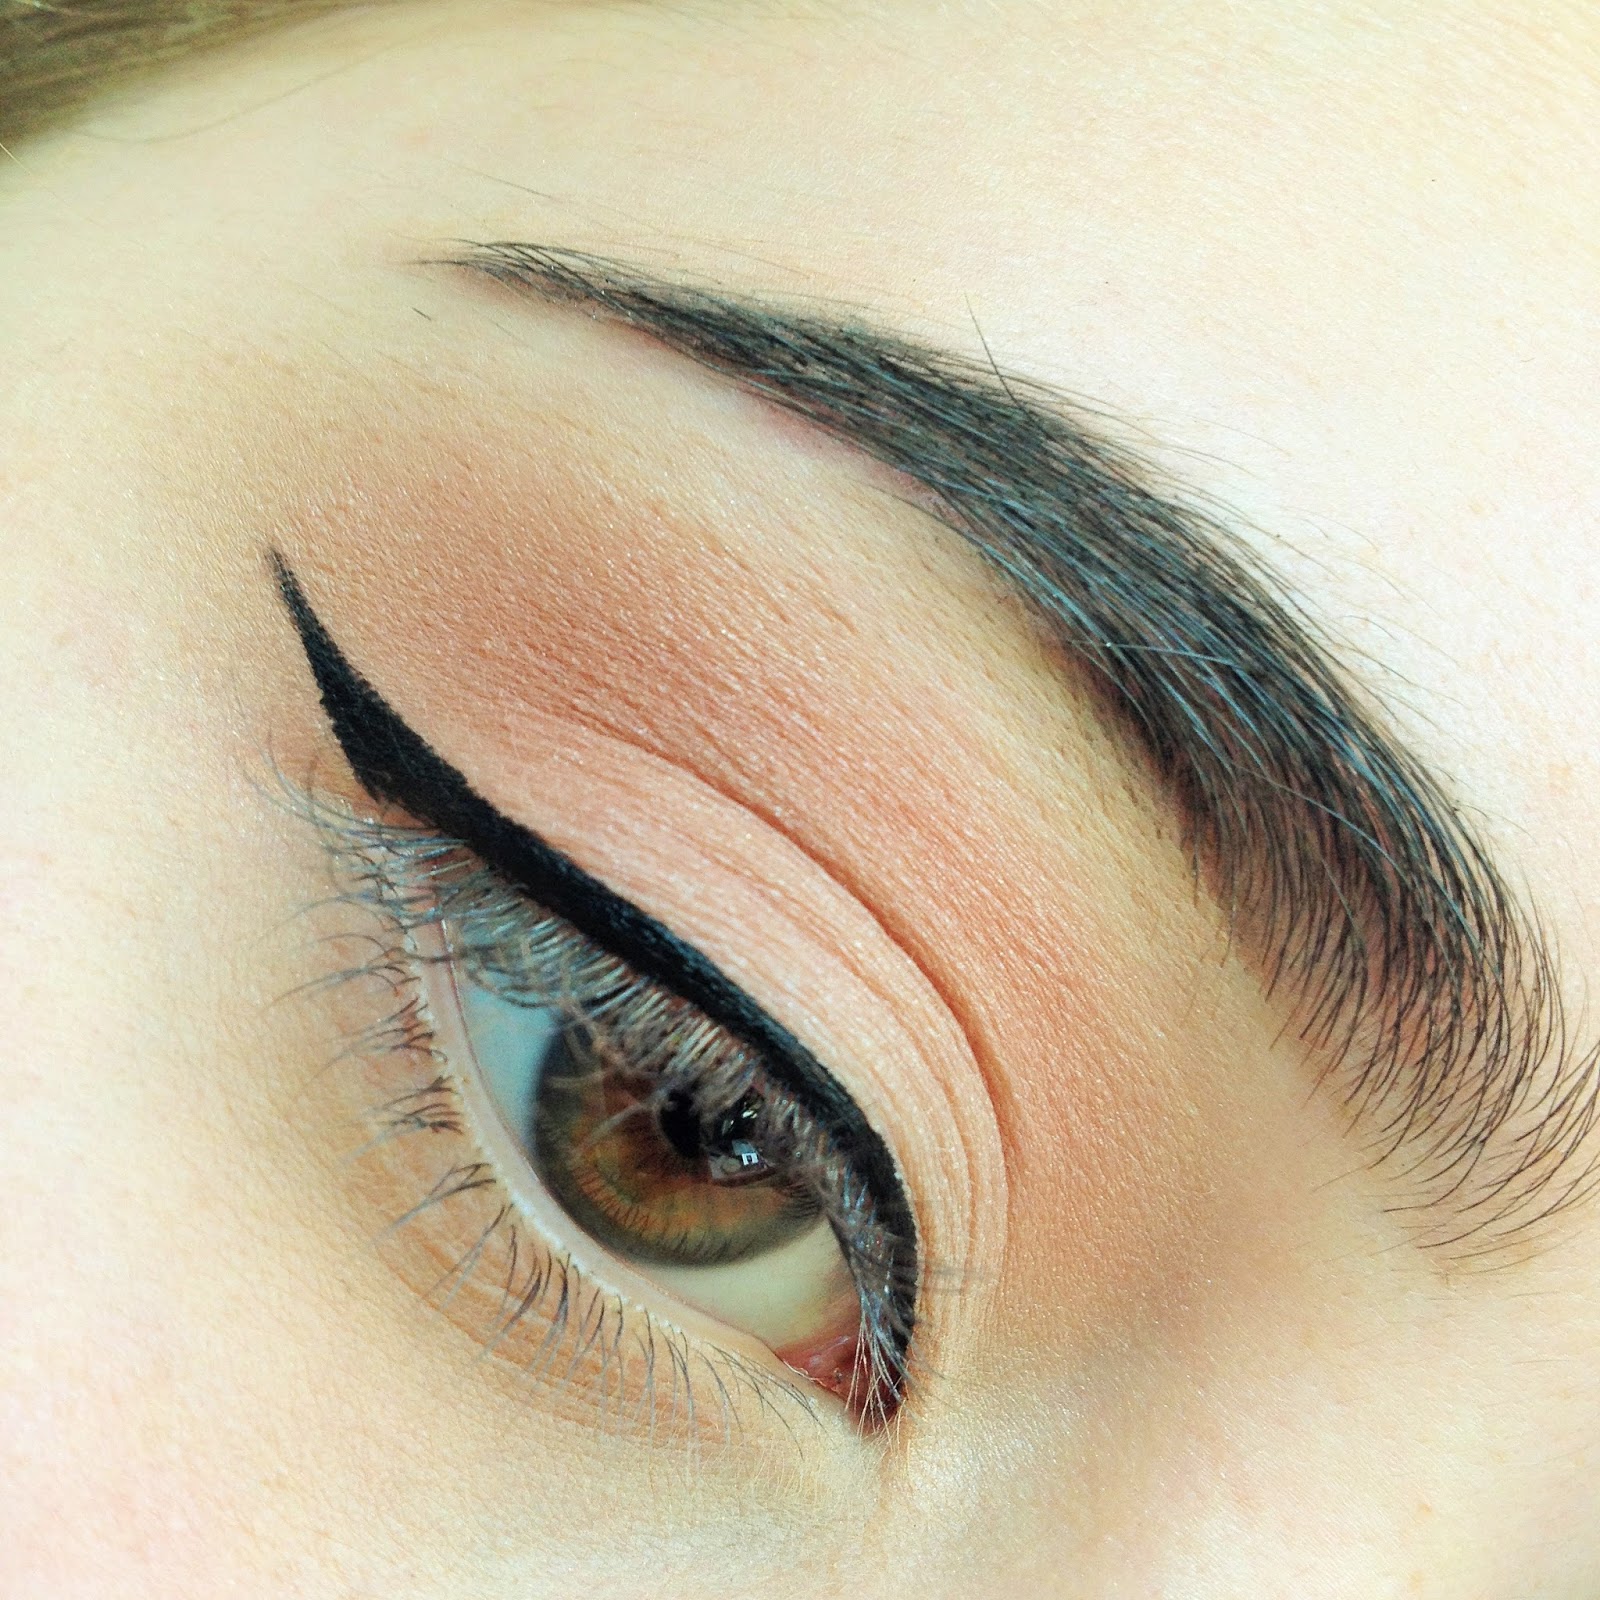
You can't really tell, in the pictures but I then added the shade Rubble, a matte warm brown, and Haze, a slightly shimmery purple. I again used a blender brush to do this. I also added exhale, a matte creamy white, and Light, a shimmery pink, to my inner corner to open up my eye. For some reason this is my last picture even though I did more steps but it was a simple look.
To finish off the look I added my Maybelline master precise liquid felt pen eye liner, Clinique mascara on my top and bottom eyelashes and a YSL kohl liner into my water line. I also added individual lashes and the shade Shadow under my eyes.
So this is the final look, I really like how it turned out! I don't know if I'll be able to post for the next few weeks but in July I'll be able to post a lot more. Also if you want to buy the Smokey palette, you can get it here
 
Thankyou for reading!

Sunday, 5 June 2016

MAKEUP REVOLUTION ICONIC SMOKEY PALETTE

I think this palette has been out for quite a while but I only got it recently. The palette is an amazing dupe for the Urban Decay Naked Smoky Palette, I didn't think I was going to like the palette that much as it contains a lot of cool shades but I actually really like it. It contains twelve shades and only four of them are matte and the majority of the shades are grey so if you don't like grey tones on your eyes this palette may not be for you. The formulation of the eyeshadows are the same as all makeup revolution eyeshadows. This palette is £6 which is obviously a lot cheaper then Urban Decays shadows. The palette also comes with a double sided brush, which is quite good.
 
I should have a tutorial using this palette going up next week, thankyou for reading!


Monday, 30 May 2016

MY EVERYDAY MAKEUP

Today I'll be showing you what I'm putting on my face most days. I won't be going through everything, as there is so much, but I will link it all below if it is not mentioned.

 
Firstly I have the Barry M Brow Kit, I only got this recently but I really like it. It comes with a dark brown cool shadow, a white and a brow gel. I don't really use the gel because I like my Maybelline brow gel, which I now realise I forgot to include in the pictures,  but I do use the brown shadow everyday. Although It isn't really needed because every brown eye shadow would work. I like my Freedom brow pomade when I want a really strong brow but I like this for a more natural look. It also comes with tweezers and a double sided brow brush. I don't like the tweezers, they are too stiff and I find are basically impossible to use.

 
Next I have Tanya Burr's Hollywood eyes palette, I don't use this everyday because I like to change up my eyeshadow look. If I'm not using this then I'll probably be using kitten by Stila. But I really do like this palette it contains 4 shades, three are mainly matte and enchantment consists of mainly glitter. The palette is warm based and I think it suits everybody. I find the eyeshadows are quite powdery but they don't fall out onto your face, It only means you use up more product.


Lastly I have the Kiko white eyeliner which I really like because it stays on all day and it's so affordable! I like to put this in my waterline as it really opens my eyes. Kiko also do a nude eyeliner like this which has the same effect but is a bit more subtle.
 
Here are all the products I use on my face:


 Sorry this post is up late, I can't get my internet to work, I still can't now  so once I fix it I'll put in all the links to the products I use! Thank you for reading Xx
 

Sunday, 22 May 2016

WARM PURPLE & GOLD MAKEUP TUTORIAL

Today, Ill be showing you how to recreate this look. I really wanted to create a look using purple eyeshadow, so this is what I came up with! Again, I'm sorry for not posting on Wednesday, I just have a lot to do for school. I think I'm going to have to schedule posts for the next 6-7 weeks because I'll be very busy. However, after that I should be back to posting two times a week, hopefully even more. Im planning on doing what's in my makeup bag, as I have been doing the same look basically everyday. Also, I want to do some more wearable eye looks!
After applying primer and filling in my brows I applied the second shade from the Clinique All About Shadow Quads in 'Going Steady' into the crease of my eye and the outer third of my lid.
I then applied the shade 'glow' from Makeup Revolutions Smokey Palette . I used my finger to do this, too get the best pigmentation out of the eyeshadow.
I then applied the darkest eyeshadow from the Clinique quad, on the outer third of my eye and brought the second shade in Clinique's quad under my eye. I also applied BECCA champagne pop in my inner corner, to open my eyes up.
Lastly, I cleaned up the edge of my eyeshadow, and applied eyeliner, mascara and individual lashes
I hope you enjoyed this post, please subscribe to be notified when I post or follow me on bloglovin, I really appreciate it!


Sunday, 15 May 2016

MY FAVOURITE AFFORDABLE FOUNDATIONS

 Today I will going through my favourite affordable foundations. I feel like foundations are such a personal thing, a product could be very popular and then you buy it and it doesn't work with your skin. Some people are lucky enough for their skin to not react with any foundations, but others, the majority, go through so many foundations just to find one perfect for them.
 
Rimmel Match Perfection I only got this recently, but I have quickly become in love with it. It gives a medium coverage, but it is buildable. The foundation claims to blend with natural skin tone, rather than masking it. It also claims to reduce the size of pores, which I definitely agree with. I always apply the Nivea Post Shave Balm as a primer, which doesn't reduce pore size, which other primers often do, so I know it is the foundations formula. It comes in 12 different shades, ranging from light to dark, so hopefully there is a shade for all skin tones. I am in shade 103 true ivory, which is one of the lightest shade and I am fairly pale.
 
Loreal Paris Infallible Matte For about three months this was the foundation I had on everyday. It is the best affordable foundation I have found to actually stay on all day while staying matte, However, there are only 6 shades, which is fine for most, but for darker skin tones there is no appropriate shade. I have to mix the shade Ivory and Sand to get my skin tone. I have found it to be a bit cakey on the skin, But it is the only foundation that stays on my skin all day so this doesn't really bother me too much.
 
Bourjois Healthy Mix I really like this foundation, It claims to last 16 hours which I haven't tested but It definitely lasts for a long time. It is meant to give a healthy glow to the skin without appearing oily, which I also agree with. Again there isn't a large shade range, so it's not great for darker skin tones. I like this foundation because It gives medium coverage but looks invisible on the skin. I am in the shade Light Vanilla, which suits me perfectly.
 
Loreal True Match I only got this recently and I think it's perfect for people who like a dewy finish for their foundation. Personally I found by the end of the day I looked too shiny and I needed to keep applying powder. However, I know many people like a dewy finish so I thought I would include this in my favourite affordable foundations. Also it comes in 23 shades so is perfect for all skin tones and looks almost invisible on the skin!
 
From the far left; Loreal Paris Infallible Matte, Borjois Healthy Mix, Loreal True match, Rimmel Match Perfection   
(Without flash)
(With Flash)
 
Thankyou for reading, hope you found this helpful, I'm sorry for not posting on Wednesday but hopefully I will this week.
 

Sunday, 8 May 2016

ROSE GOLD LINER EYE MAKEUP TUTORIAL

I recently saw a picture on Anastaia Beverly Hills instagram account of a makeup look someone has created (you can see it here), I thought it was so pretty and had to recreate it. My recreation was nowhere near as good as her's but I think that was due to the rose gold foiled eyeshadow I used, I think the girl used Dirty Talk by Colour Pop, a crème gel colour pot. But in England you cannot buy Colour Pop so I could only use what I had.
 Firstly I applied the Urban Decay primer potion for my base.
I then applied Kiko's Infinity shadows in the shade 210, into the crease of my eye and the outer third of my eyelid.
I then applied my black liner, I used the Maybelline master precise.
Lastly I applied the rose gold eyeshadow just above the black liner. I found this difficult to do because the chunks of glitter in the eyeshadow were quite big and it was difficult to have a smooth line. I also applied mascara to my top and bottom lashes, I used the telescopic mascara by Loreal. I used eyelure's individual lashes to finish the look.
Thankyou for reading, It wasn't a very difficult tutorial but I thought it was a really pretty look that I wanted to recreate.


Wednesday, 4 May 2016

DIY POLAROIDS

I didn't know whether to post this or not as its a bit different to my normal beauty posts and it might be a bit self explanatory. I think polaroids are so cute, however the camera and film is so expensive, especially when polaroids are not that hard to make. I know this is a bit different from my normal posts but I wanted to share this as I think its such a good, affordable gift idea. I currently have quite a few pegged on to a piece of string in my room and I think it looks really pretty, I also gave some to my friend for Christmas and she seemed to love them!
I have created a template for you to use (here) and all you need to do is attach the pictures you wish to use. You could include pictures of anything you want. I have pictures from my holiday last year and pictures with my friends and family.

1.Once you have downloaded the document go to insert - image...

2.Then select the images you want and drag them onto the polaroid template and alter them to fit the sizing.

3.Then click on the printer button. For the best result, use photo paper when printing. I would choose A4 sized photo paper, unfortunately I only have small sheets but that's fine as it still works perfectly.
4. Once printed, cut around the outline and you have your finished polaroids. You can now use them however you want. Hope this was interesting, Thankyou for reading xx